Progress Photo Guide for Your Clients
Progress photos are only useful when you can compare them week to week. If one week is taken in the bathroom mirror and the next in the hallway at a different distance, it's hard to tell what has really changed.
So whenever your form asks for progress photos, your clients get a short guide showing them how to take them: example front, side and back photos, and three tips. It's built into Assistant Coach, so there's nothing for you to set up, write or link to.
What your clients see
On their intake
Where your intake asks for progress photos, your client sees a card with three example photos (front, side and back) and How to take your photos underneath. This is where they take their first photos, so the examples are right there in view.
On their check-ins
On a check-in, the guide is a single link under the photos section's title: How to take your photos. By then your client has seen it once, so it stays out of the way until they need it.
The guide itself
Tapping the card or the link opens the guide over the form, without leaving it:
- Example photos of a front, side and back pose, so your client can see the framing and the pose to copy.
- A Women | Men switch, so your client can see the examples that match them. It starts on Women, and their choice is remembered on their phone for next time.
- Three tips: take them in the same place, with the same light and the same clothes each time; hold the phone at chest height, about 2 metres away, using the timer or asking someone; and keep the whole body in frame, with a note on how to hold their arms.
Your client closes the guide and carries on with the form. Nothing they've already filled in is lost.
The example photos are illustrations made for the guide, not real clients.
The example photos
These are the examples your clients see, for women and for men.
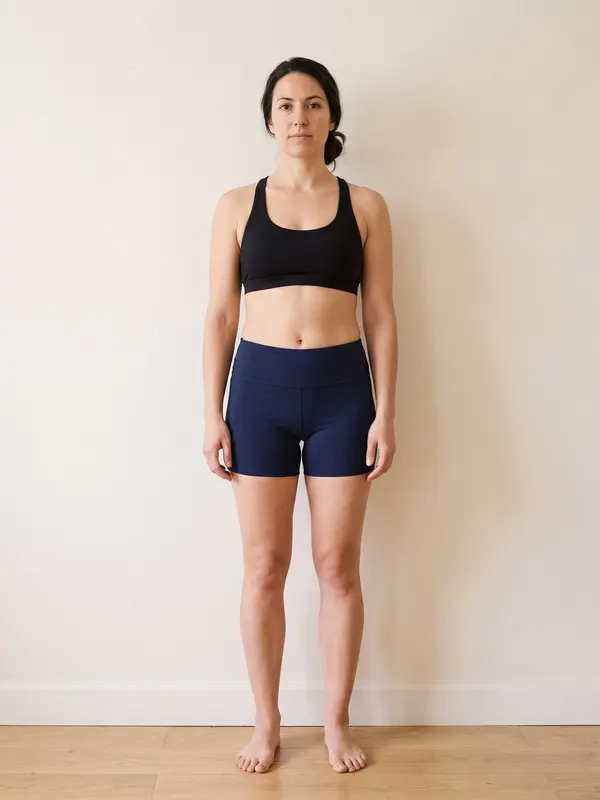 Front
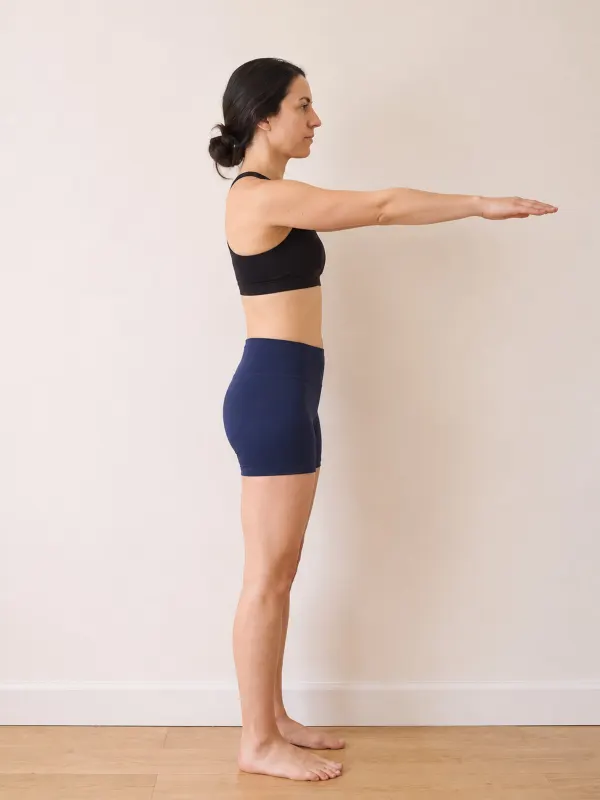 Side
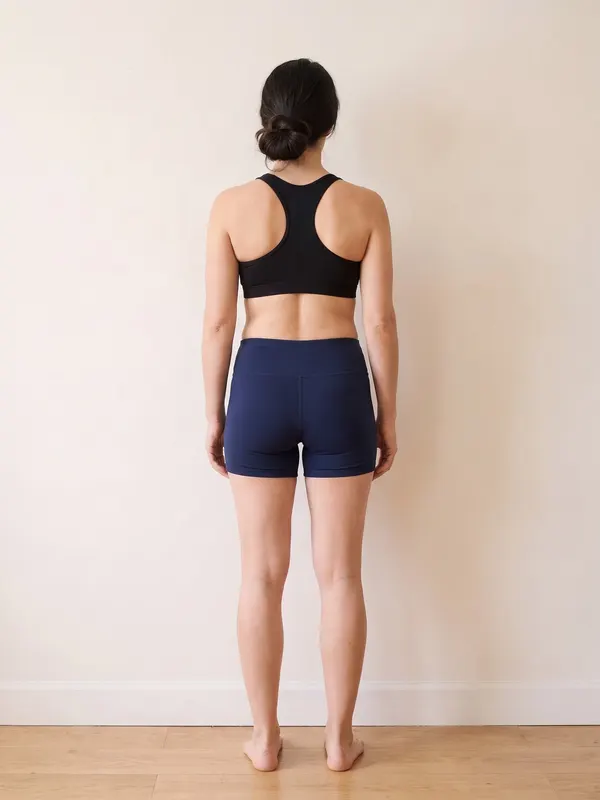 Back
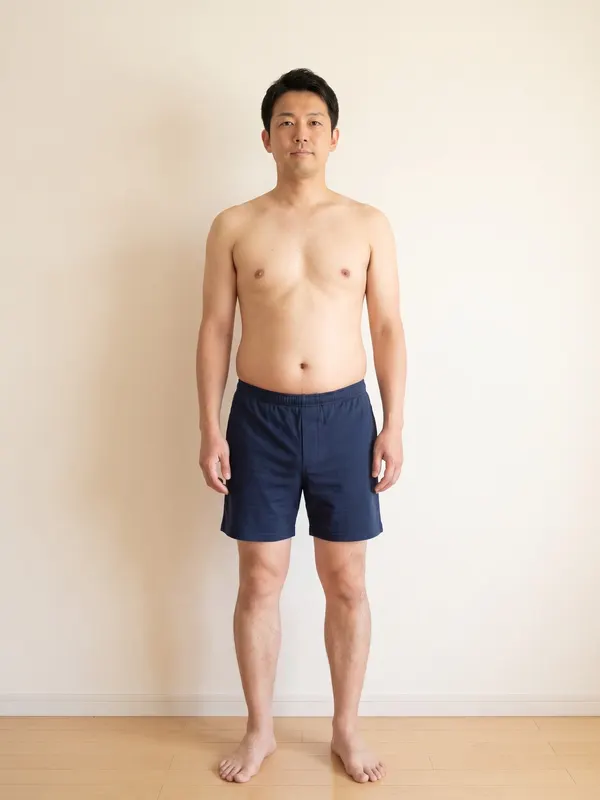 Front
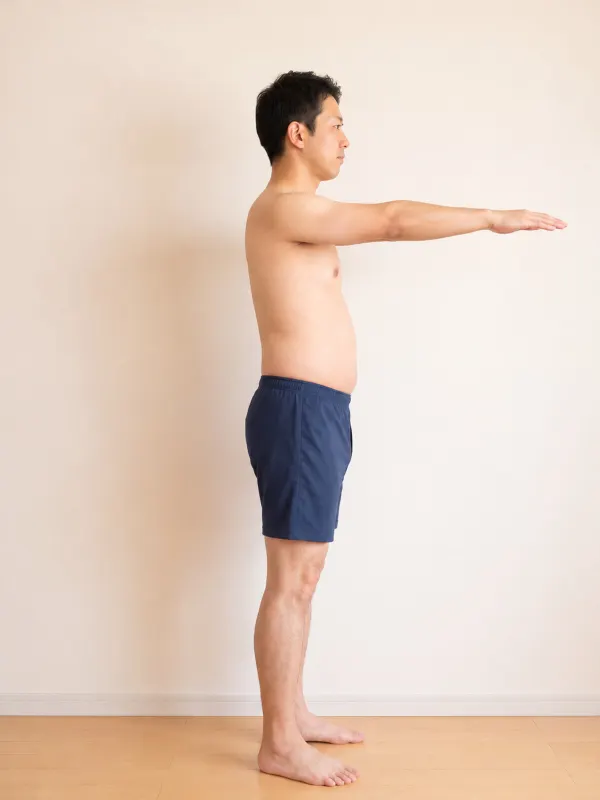 Side
 Back
Who gets it
Every coach, on every plan. It appears automatically on any intake, check-in or custom form that includes the built-in progress photo questions (Progress Picture - Front, Side or Back). Your existing forms already show it.
A few things to know:
- Your own instructions stay. If the photos section already has your own text, your client sees it first, with the guide just below. If your text links to an outside article about taking photos, you can remove that link now if you like.
- One guide per form. If a form has photo questions in more than one section, the guide shows on the first one.
- Only on the built-in photo questions. A photo question you added yourself as a File question doesn't show the guide. To give clients the guide, use the built-in progress picture questions.
See it for yourself
- Go to Forms.
- Click Preview on an intake or check-in that asks for progress photos.
- The preview opens in a new tab, exactly as your client sees it. Click the card or the link to open the guide.
Using it in your coaching
- Mention it when you onboard a client. "There's a quick guide on the photos question showing how to take them. Follow it every time and we'll be able to see your progress clearly."
- Point back to it if photos drift. If a client's photos start changing angle or distance, ask them to open How to take your photos on their next check-in rather than writing the instructions out again.
Related guides
- Measuring Guide for Your Clients -- the same kind of guide for tape measurements
- Form Templates -- adding progress photo questions to your forms
- What Your Clients See -- the whole client app from your client's side